Echolite - Update #7 - All Things Machines! - Part 1
"Creativity at its finest" -someone, probably
I'm an indie game dev working to create engaging games, and inspiring others to do the same!
With the resource collection system in place from the last devlog, we are finally able to move on to another core aspect of gameplay - machinery! This devlog will introduce the initial setup for machines, while the following devlog will develop the more in-depth mechanics with them.
Artwork Preparation
Focusing on early gameplay, we need some basic machines built on top of our first few resource tiles. After much thought, here is the general breakdown I came up with:
- Ore tile - Machine with smoke stack/pipe - This would feature a rising particle effect and have a metal-esque aesthetic
- Debris tile - Machine with moving drill - This would have a spinning drill with particles flying out underneath
- Sparkshroom tile - No machine - Since this tile gives materials that help with lighting, allowing automation to scale too quickly could conflict with gameplay pacing. This may change in the later stages of the game to allow for easier collection options, but for the early game we will keep this tile as-is
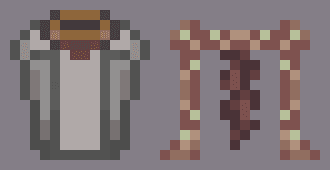
With these rough ideas established, the next step is assembling the artwork. Since these are custom assets, numerous revisions were needed to nail the right look. For example, here are a few of the initial drafts for the ore machine:

I know what you're thinking (I was thinking it too) - wow, those are awful! These first few designs were scrapped for a variety of reasons. First, the shaping wasn’t too interesting - if you saw this machine next to other items it might not be easily identifiable. Second, the designs were too flat. Giving believable depth to items in this top-down format can be quite the challenge. Third, the machine fails to highlight the main animation feature of rising smoke since it isn’t clear where it would appear.
At this point, I came up with a better approach for designing machinery. These are likely basic design principles that I just happened to miss out on until now, but this process of discovery does help nail down the “why.”
- Start with 1-3 placeholder colors and focus on the general “shape” or outline of the piece
- Swap out colors with the chosen palette
- Tweak colors or introduce a small amount of new ones to give depth - using darker colors as shadows or with sections that are further away from the player’s sight greatly helps
- If needed, make multiple copies at each above stage and don’t be afraid to make wild changes to experiment. This is the fun part of art and design!
With this more guided approach, here is the final design of the ore machine!

The drill design was a lot easier to nail from here, so drumroll…and….ta-da!

Next up is building these items in-game. This is where a major decision had to be made - how am I going to set up items with their own conditions, logic, interactions, etc…? Adding in items like geodes and clay chunks are relatively easy because they all feature static objects. With a folder of sprites, I can quickly reference the art and display it accordingly in a grid. These complex objects aren’t just static objects though, so I needed to plan out this new feature carefully.
Luckily, Godot makes it easy to create saved scenes with a mix of nodes. We can create a placeable object as a saved scene, allowing complex information to stay isolated to that specific object. This new method of creating objects may be a little tedious at times, such as adding tons of furniture objects, but overall it will make everything more organized and less hard-coded.
Finally, we can proceed with importing these assets into Godot and save them as separate scenes into a separate “placeable items” folder. Inside each saved scene, we add unique features like different particle effects. Here is how the ore machine looks in-editor for example:
Object Placement
Implementing object placement requires a few assets and a bit of extended logic. To start, we create some new cursor icons to show where the player is attempting to place an object. These are color-coded to signify when the object is hovering over a valid or invalid spot in the world. For animation, the edges will move in and out of the corners over the desired tile. Here is the final look:

Adding these assets into Godot is the easy part, but knowing where to place them in the hierarchy is much more difficult. I initially assumed that they could be placed at any point within the node tree, given that it can freely access the tilemap of the world. It would be similar to the echolocation dashboard or the player’s digging action.
This logic was flawed because we have different positions to consider. The mouse has its own position around the screen while the world map and player have set positions based on tiles. Thanks to some wonderful assistance on Godot’s help channels in the official Discord, users were able to point me towards a special function called “get_global_mouse_pos().” This neat function retrieves the position of the mouse relative to the canvas it exists on. As object placement requires tilemap information, the new placement cursor scene must be placed as a child of the world tilemap. This change allows for easy identification of tiles based on the current position of the cursor.
Now, we have to consider different mouse cursors. Currently, the game has a custom “pointer” cursor that is set up as an autoloaded scene. Whenever the game is booted up, the mouse is one of the first items to appear. Using its more general position, we have a constantly-running function that syncs the custom cursor sprite position to the actual position of the player’s mouse. This creates the illusion of a custom cursor even though it simply lays on top of the default one.
Since the placement cursor is not autoloaded however, we need to allow the player to switch between cursors based on their desired action. Just like the “collect_action” keybind we set up for resource collection, I opted for a new “placement_mode” keybind. When this is triggered, the game enters build mode and the mouse cursor hides itself while “activating” the placement cursor. The placement cursor uses identical logic to follow the player’s mouse movements every frame and start evaluating placement conditions (if an object is also selected in the hotbar).
We are left with 2 final stages of development. Next, we check if the object is hovering over the correct tile. Assuming it does using the global mouse position, we set a placement boolean to true. If the player performs a mouse click with this value set to true, then we can finally proceed to the last stage!
Object placement should be handled separately from the placement cursor. It will keep code organized and avoid overlaps in the process. Since we are placing complex objects like machines, they will likely need to retain their own data. Given this complexity, I planned out the phases like so:
- Create a new “world objects” node that handles object placement and removal
- Check if a “world placeables” directory exists - if it does not, then create one
- Assemble a unique machine name by passing the creation function the name of the object and it’s tile-based coordinates. For example, an ore machine placed at the center of the world will have a unique name of “Ore Machine - (0,0)”
- Create a custom directory within the “world placeables” one, naming it with the object’s unique name
- Inside that object’s directory, create a basic save file detailing the object’s name, position, and unique name. This will help with future work. Any object can reference its own file save, add additional information, and reference the details of another object.
- Update a world placeables array with the unique name of the object. This will be used for reinstancing all of the machines whenever the player returns to the game later. While I could just loop through the directory anyways and instance each item, there may be cases where not everything needs to be added.
- Within the node tree, instance the object as a child node by referencing the default saved scene created in advance. Any other follow-up actions can be performed by the object once placed - this general world placement node should only be focused on the initial setup of new objects
- Update the hotbar to reduce item quantity or remove it
A little bit of coding magic sprinkled around, and all of these steps are implemented! Once the placement cursor verifies that the object selected by the player is in a valid location, it will ping the world placement node to handle actual instantiation and placement. Here is how the ore machine looks:
And as a fun bonus, here's the hatch drill as well:
What’s Next?
“Part 1” definitely means that a Part 2 is on its way to an awesome blog near you! Now that machines (among other objects) can be placed into the world, some interesting logic can be added to those machines.
I also want to extend another thank you! I started this entire blog just 3-4 months ago, and we're already over 2,000 total views. To some it may seem small, while to others it may feel large, but to me it means the world! As support continues to grow, it motivates me to build even bigger and better features for all of you to enjoy. It's been great getting to interact with so many people, and I look forward to seeing the community grow further <3